1. Setup
CS1302 Introduction to Computer Programming
1.1. JupyterHub
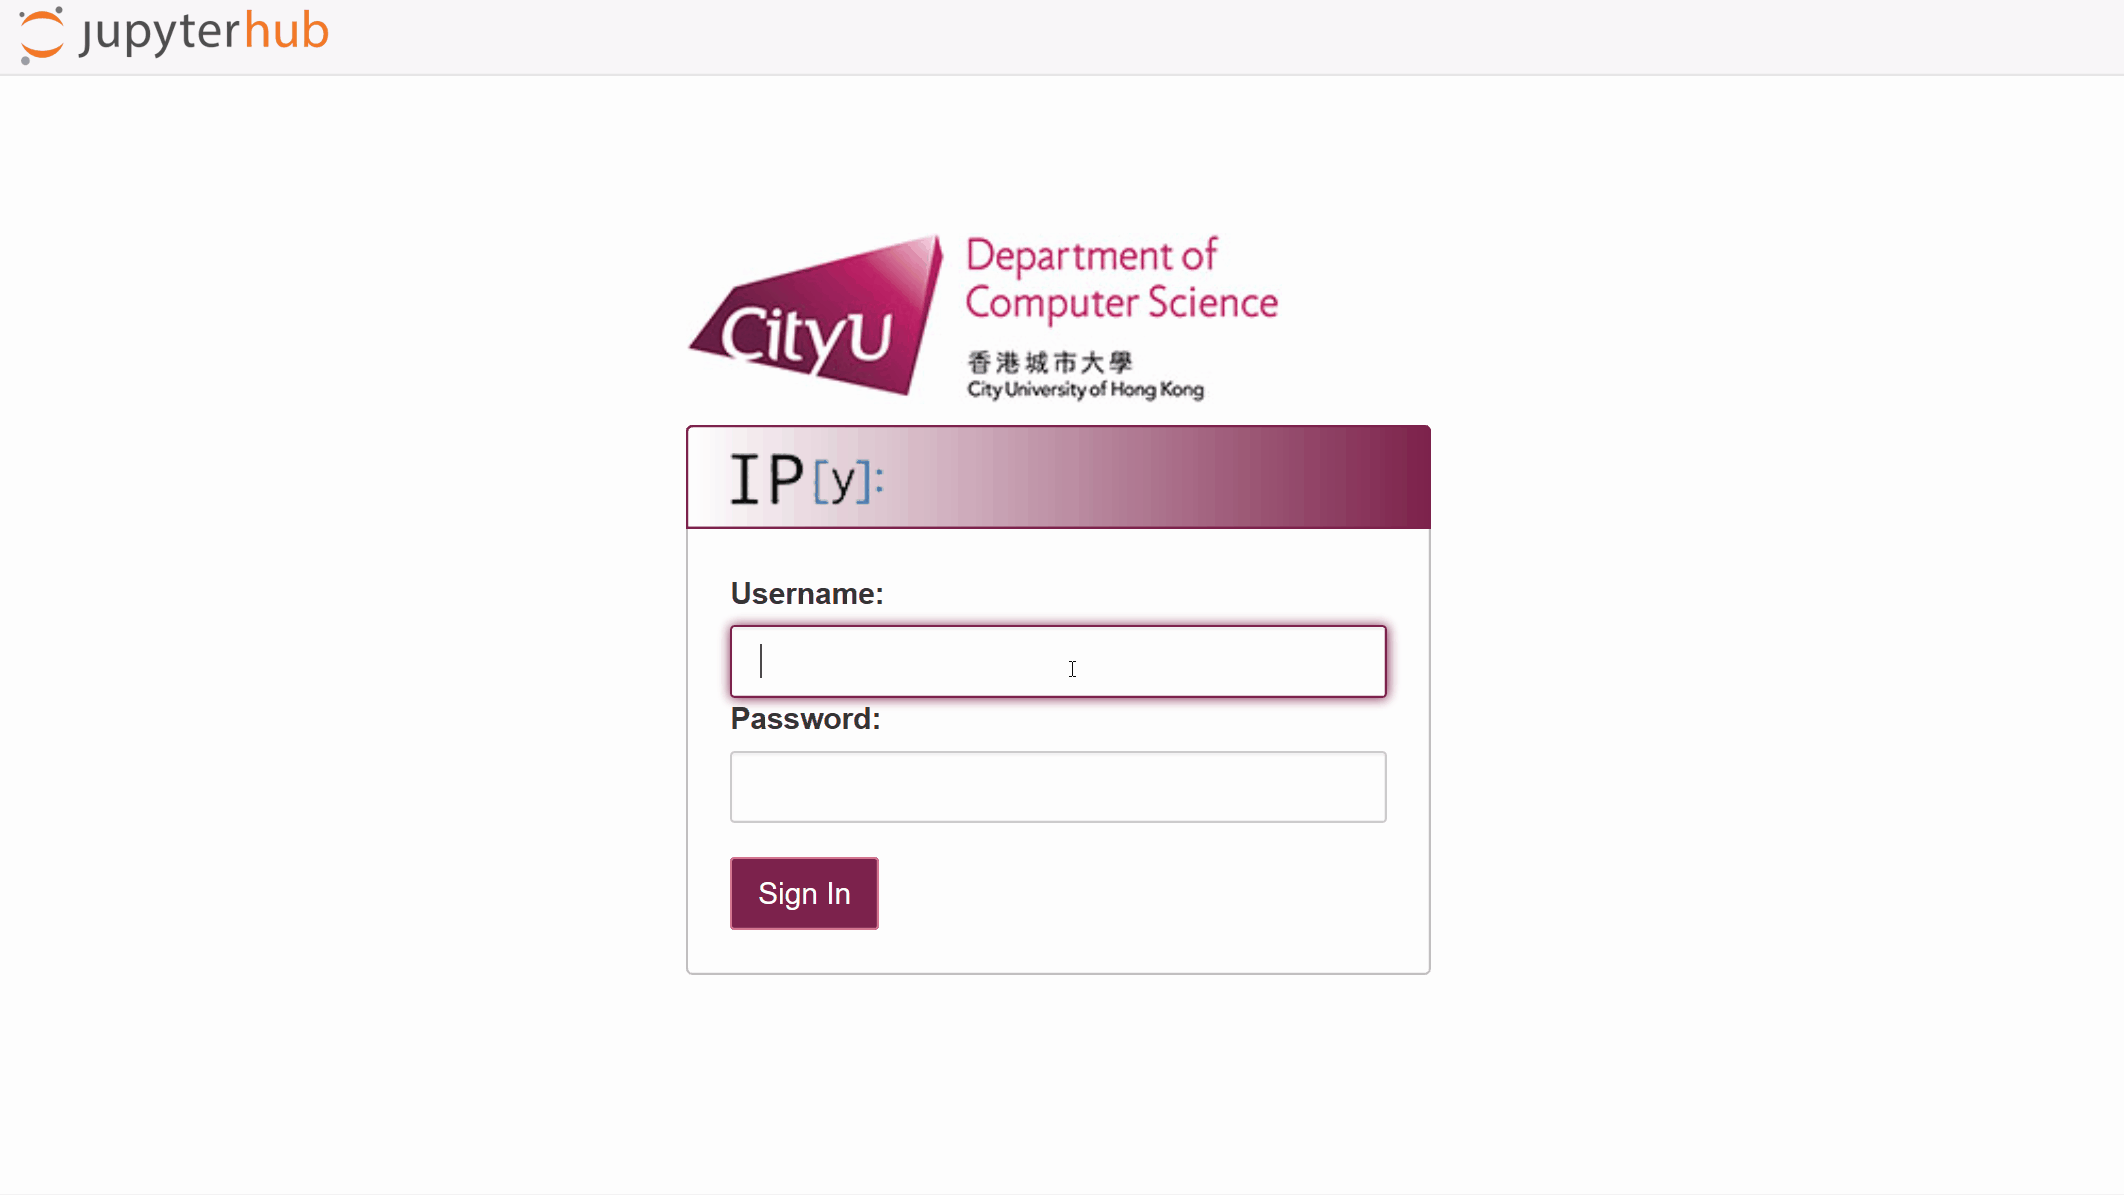
1.1.1. How to access the JupyterHub Server?
Enter the url of the Jupyterhub server ltjh.cs.cityu.edu.hk in a web browser.
Enter your EID and Password in the fields
UsernameandPasswordrespectively.Click the
Sign Inbutton.
Tips
If the browser is stuck at the following page loading the server,
refreshyour browser.

If you see the following page with
My Serverbutton, click on that button.

If you see the
Start My Serverbutton instead, click on that button to start your server.

For other issues, try logging out using the
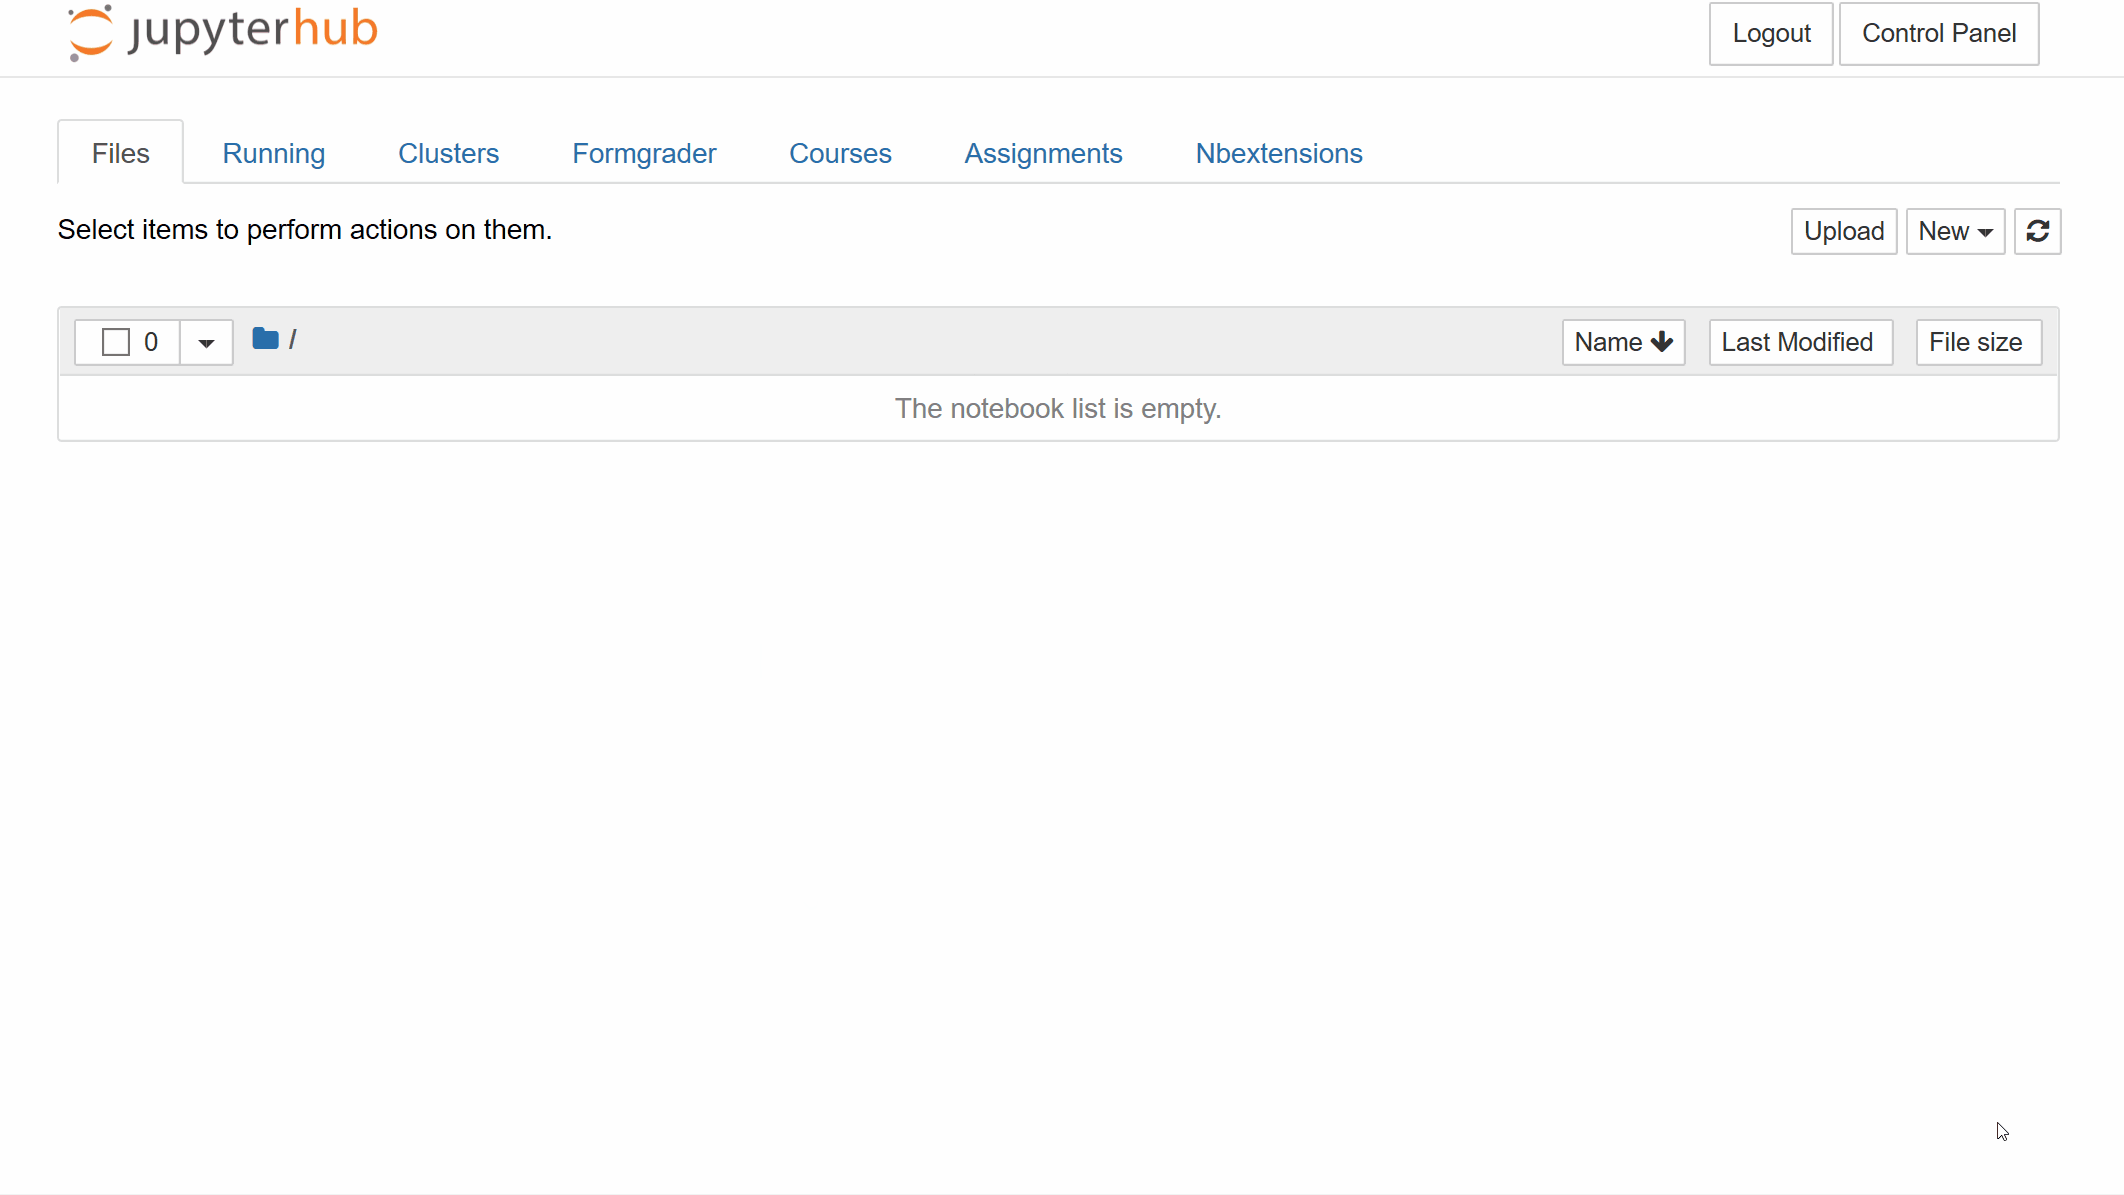
Logoutbutton at the top right-hand corner, and then logging in again. You may also click theControl Panelbutton and restart your server.
1.1.2. How to access course materials?
Click on the
Assignmentstab, and ensurecs1302is chosen in the drop down list.In the
Released assignments panel, click the buttonFetchto downloadLab1.Lab1should appear in theDownloaded assignments panel.Click on the little arrow next to
Lab1to show its content.Ctrl-Click on
Lab1to open the assignment folder on a new browser tab.On the new browser, click the folder
cs1302to navigate to the notebookSetup.ipynb.Click on
Setup.ipynbto open the notebook.
Tips
Note that all the downloaded course materials will be placed under the
cs1302folder of your home directory by default, so you need not go to theAssignmentstab again to open the downloaded materials. E.g., you can access theSetup.ipynbnotebook as follows:Going to the
Filetab, which is the default JupyterHub homepage after login or when you click the logo on the top left-hand corner.Enter the notebook URL ltjh.cs.cityu.edu.hk/user-redirect/tree/cs1302/Lab1/Setup.ipynb. (See the documentation for details.)
If for any reason you want to Fetch
Lab1again, you have to first rename yourLab1folder to a different name such asLab1_orig. You can do so by selecting the folder and click rename. You can also remove the folder by evaluating!rm -rf ~/cs1302/Lab1in a code cell. (Be very cautious as removed folders cannot be recovered.)
1.2. Jupyter Notebook
1.2.1. How to complete a lab assignment?
After opening the Lab1 notebook Setup.ipynb:
Click
Help->User Interface Tourto learn the jupyter notebook interface.Click
Help->Notebook Helpand skim through the tutorials onRunning CodeandWorking with Markdown Cells.
Exercise In learning a new computer language, the first program to write is often the “Hello, World!” program, which says Hello to the world. Type the program print('Hello, World!') below and run it with Shift+Enter.
### BEGIN SOLUTION
print('Hello, World!')
### END SOLUTION
Hello, World!
We often ask you to write a code in a particular cell. Make sure you fill in any place that says YOUR CODE HERE or “YOUR ANSWER HERE”.
In order to check your work thoroughly, there will visible and hidden test cases. The following is a visible test you can run to check your answer: The test returns an assertion error only if your program does not print the correct message.
# Run this test cell right after running your "Hello, World!" program.
import sys, io
old_stdout, sys.stdout = sys.stdout, io.StringIO()
exec(In[-2])
printed = sys.stdout.getvalue()
sys.stdout = old_stdout
assert printed == 'Hello, World!\n'
Tips
You can repeatedly modify your solution and run the test cell until your solution passes the test. You are not required to know how the test cell is written.
To assess your solution thoroughly, we often run new tests hidden from you after you have submitted your notebook. There is no partial credit for a partially correct solution that works for the visible test but fails for the hidden test. Therefore, you should ensure your solution works in general rather than just the visible tests.
You can click the
Validatebutton to run all the visible tests.If you open the same notebook multiple times in different browser windows, be careful in making changes in different windows. Inconsistent changes may lead to conflicts or loss of your data.
If your notebook fails to run any code, the Kernel might have died. You can restart the kernel with
Kernel->Restart. If restarting fails, check your code cells to see if there is any code that breaks the kernel.
1.2.2. How to submit a notebook
Although Lab1 does not count towards your final grade, you are required to submit it, to get familiar with the procedure.
Before you submit, make sure everything runs as expected:
Restart the kernel:
Kernel->Restartrun all cells:
Cell->Run All
To submit your notebook:
Go to
Assignmenttab of JupyterHub where you fetched the Lab assignment.Expand the Lab1 folder and click the
validatebutton next to the notebook(s) to check if all visible tests pass.Click
Submitto submit your notebook.You may submit as many times as you wish before the due date as we collect your latest submission for grading.
No late submission will be collected without valid justifications.
Double check that you have submitted the correct Lab assignment.
You are responsible for recording your submission attempt with a valid timestamp in case of technical issues.
Tips
You normally have at least 5 days to work on the lab after your lab session.
You can check the due dates of all the labs from the course homepage.
You may seek help from us or your classmates. However, you must write your own solution and indicate who your collaborators are using the code:
COLLABORATORS = ['WONG Xiu Fong', 'LEE Man Kit']
1.3. Advanced Usage
1.3.1. How to print or backup a notebook?
To convert a notebook to pdf, we can print it to pdf instead:
File->Print Preview
However, animation and video cannot be properly printed. You are highly recommended to takes notes on the dynamic notebook instead on the hard copy.
To download a copy of your notebook:
File->Download as->Notebook (.ipynb)
You can run the notebook
locally using Anaconda, or
remotely on other JupyHub services such as Google Colab.
However, you would need to learn how to manage and install the additional packages required by the course.
1.3.2. Jupyter Lab and extensions
Instead of the classic notebook interface, you may also play with the new interface called JupyterLab by visiting ltjh.cs.cityu.edu.hk/user-redirect/lab/.
Note that the new interface does not support the validation and submission of lab assignment. It is currently under active development on GitHub, so be prepared to see bugs.
You may use the visual debugger in JupyterLab to debug a jupyter notebook. To do you, you should open the notebook and choose XPython as the kernel.
Both the notebook/lab interface is extensible. For the notebook interface, you can enable extensions from the nbextensions page.
1.3.3. Visual Studio Code
For a complete IDE experience, you can open VS Code as follows:
In classic notebook interface:
Filetab ->Newmenu ->VS Codemenu item.In JupyterLab interface:
Filemenu ->New Launchermenu item ->VS Codeicon